If you’re a productivity nerd, you’ve likely heard of Notion — a note-taking app that does much more than just taking notes. Even if you don’t get the hype of productivity, it’s still worth checking out the templates on Notion’s website. There’s a good chance that Notion could replace a few apps on your phone, such as the habit tracker, the to-do list or the bookmarking app.
What makes Notion interesting is that you can publish a Notion page to the web with just one click, and anyone with the shared link can view your page. In other words, every page you create in Notion is your personal website. It can be a portfolio site, a blog, a product roadmap, a job board, etc.
But how about creating an online store? With Foxy, that’s totally possible, since Foxy is a headless ecommerce platform, which means it can be integrated with any website. Let’s see how it’s done in Notion!
Create a store within Notion
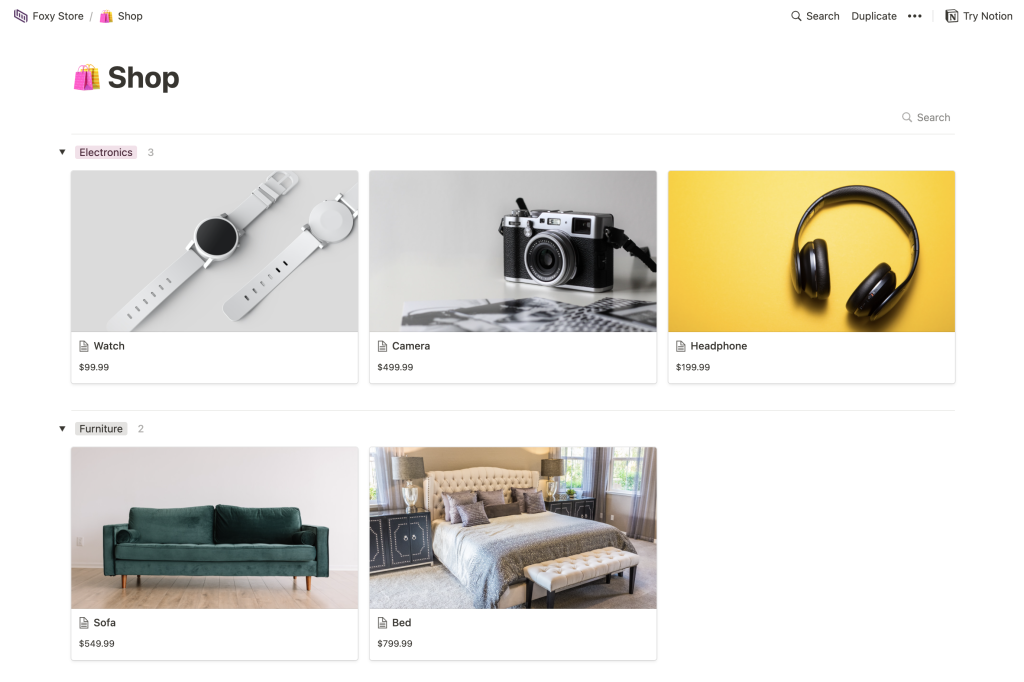
Take a look at our demo store (which you can copy to your Notion workspace by clicking the “Duplicate” button at the top right corner). Or continue reading if you’re interested in creating a store from scratch.
In Notion, create a new page for the shop page. Our demo store uses a gallery view database, as this is the most visual database view and best for showcasing products. In this shop page, create a separate page for each product. For the page properties, besides price, category, product code and other product information, add one for the purchase link that redirects customers to the Foxy secure checkout page.
For example, this is the link for the Watch product in our demo: https://foxy-notion.foxycart.com/cart?name=Watch&price=99.99&code=watch&cart=checkout
You’ll want to replace foxy-notion with your own Foxy store subdomain, and the values of the name, price and code parameters. With the cart=checkout parameter, customers will be redirected to the checkout page immediately (skipping the cart page). You can add other parameters as needed. A full list of Foxy product parameters can be found here. Also, we have a Foxy product link builder that helps generate a link.
Just like in our demo, the Foxy purchase link can be embedded in the product page body, so customers don’t need to scroll up to look for the purchase link after going through the product details.
HMAC Product Validation
You may wonder, “What if my customers know how to change the parameter values in the purchase links? Does that mean they could buy our products for free?” Good question. That’s where Foxy’s HMAC Product Validation come into play.
Details on what HMAC Product Validation is and how it works can be found in our documentation. Basically it prevents the Foxy product links from being tampered by signing them with your Foxy store secret. The store secret value is available from the Advanced Settings in the Foxy admin.
To implement this to the Foxy product links, go to the sample code page in the Foxy admin, copy the HTML below and paste it in the step 2 text box:
<a href="FOXY_PRODUCT_LINK"></a>
Replace the placeholder href attribute value FOXY_PRODUCT_LINK with the actual product link, then click the “Encode HTML” button. Heads up that you must include a code parameter in the product link.
Then you can grab the encoded href attribute value from the encoded output box and put it in your Notion product page. Before testing the signed links, be sure to enable the cart validation option in the Advanced Settings.
When you finish setting up the store and are ready to publish the site, click the “Share” button at the top right corner of your Notion shop page and toggle on the “Share to web” option. You can then copy the URL and share it to your customers!
For what it’s worth, you can set a custom URL for your workspace so it is more memorable and helps branding.
Use a store template powered by Notion
Moving forward, you may still need a complete website at some point, so your store provides a full ecommerce experience for customers (or you just want a more professional site). However, creating a website may seem daunting to non-developers, even with a website builder like Webflow or Squarespace.
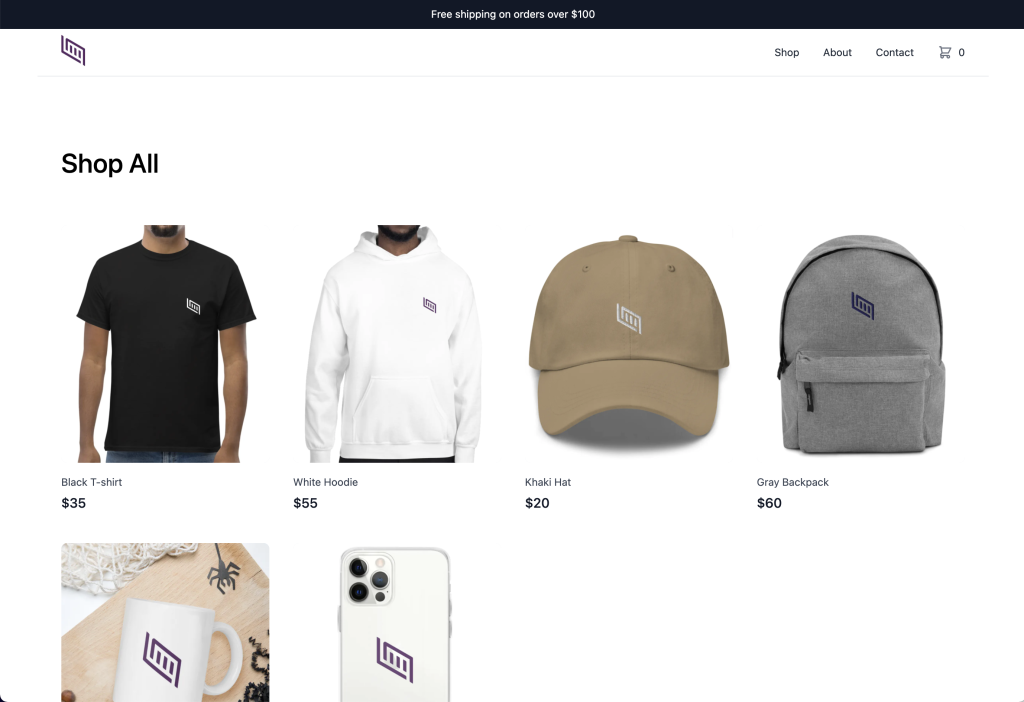
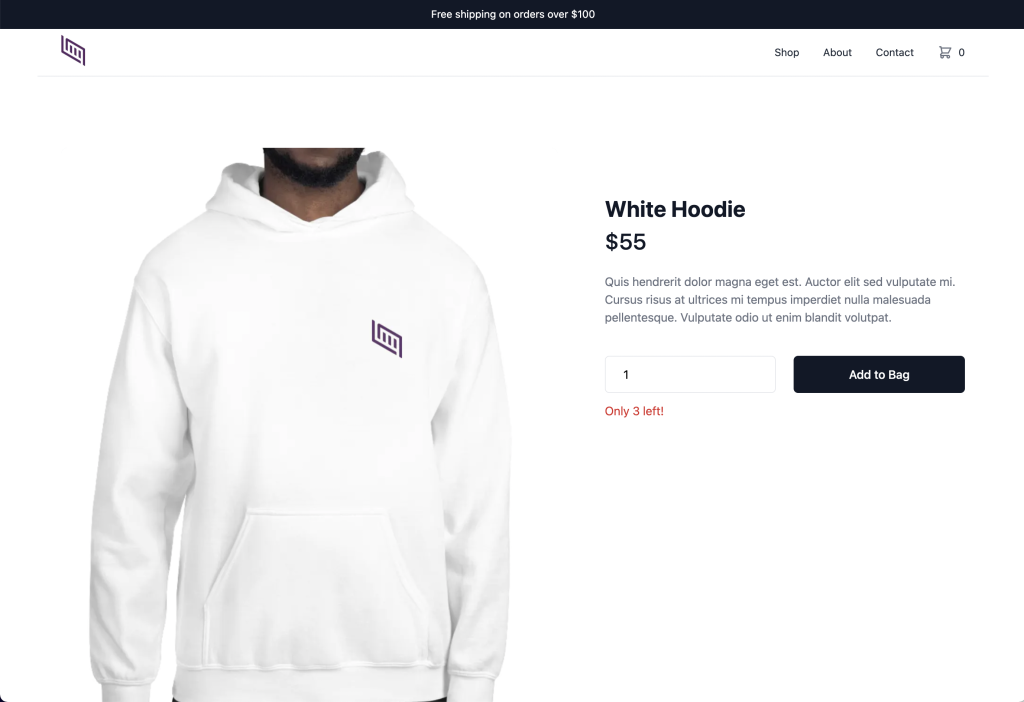
Don’t worry. We’ve got you covered. Thanks to the Notion API, we’re able to build websites powered by Notion databases. And we’ve created a store template for Notion. Check it out: https://foxy-notion.vercel.app/ (product data sourced from this Notion database).
Follow the instructions below to use the template (or you can use the quick start guide in our GitHub repository).
Prerequisites
First of all, there are a few things we’ll need:
- If you haven’t yet, create a Foxy account and a Foxy store.
- Duplicate this Notion product catalog template to your Notion workspace. Then add your own products.
Note that there’s anImage URLand anImageproperty. Links to files hosted by Notion will expire, so use theImage URLproperty if possible. (You can upload the images to a file hosting service like Dropbox to get a public static URL for each file.) If noImage URLis provided, it’ll fall back to use the link to the uploaded file. - A GitHub account, if you don’t have one. It’s for storing the code of the template.
Create an integration with your Notion database
The steps below are to connect your Notion database with our template.
- Go to https://www.notion.com/my-integrations.
- Click the “+ New integration” button.
- Give your integration a name (can be anything).
- Select the workspace where the product database exists.
- Click the “Submit” button to create the integration.
- On the next page, you’ll see an “Internal Integration Token”. Save it in somewhere safe. We’ll need it in a bit.
- In the Notion product database, click the “Share” button at the top right corner.
- Click “Invite” button, which opens a pop-up window to choose an integration.
- Select the integration created in previous steps.
- Click the “Invite” button to complete the connection.
Deploy the website
We’ll use Vercel for hosting the website. Click this link to set up the deployment.
Follow the instructions on the Vercel website. You’ll need to sign into Vercel with your GitHub account to clone our template. In the “Configure Project” section, you’ll need to provide values for the following environment variables:
NOTION_TOKEN– this is the “Internal Integration Token” we got from the Notion integration earlier.NOTION_DATABASE_ID– this is the part of your product database URL after the workspace name and the slash and before the question mark. For example, your product database URL ishttps://www.notion.so/myworkspace/a8aec43384f447ed84390e8e42c2e089?v=..., then the database ID would bea8aec43384f447ed84390e8e42c2e089.NEXT_PUBLIC_FOXY_SUBDOMAIN– this is your Foxy store subdomain, which can be found in the Foxy admin Dashboard. For example, your store domain isfoxy-demo.foxycart.com, then the subdomain would befoxy-demo.FOXY_STORE_SECRETis required only if you want to enable Foxy HMAC cart validation. To get this variable value, go to Advanced Settings in the Foxy admin. Look for the “store secret” setting, click the “Show” button, and copy the value in the text box. Also, the “would you like to enable cart validation?” option in the same section needs to be checked.
Finally, click the “Deploy” button. A moment later, you should see the success screen with the URL to your own Foxy + Notion store.
Bring it further
Hey developers! Interested in a deep dive in the code? We have a step-by-step guide on a similar stack — Build a JAMstack Ecommerce Website with Next.js, Contentful, and Foxy. The only difference is the source of products (Contentful vs Notion). Feel free to clone the repository of this template and customize it or add more functionality. For example:
- Add more pages. Next.js has a file-system based router, so each file added in the
pagesfolder automatically becomes a route. - Customize the styles. This template is styled with Tailwind CSS.
- Build a serverless function that automatically updates the inventory in the Notion database after an order is placed via Foxy. It can be an API route in the
pages/apifolder in Next.js, or a Netlify Function, or a Cloudflare Worker.
Creating an ecommerce website is rarely easy, but with something like Notion powering the product database, and Vercel for building a static site, this is an option that might make sense in certain situations. With Foxy, it doesn’t matter how you build your site; Foxy can handle the cart and checkout even from within Notion 🙂
Hopefully our guide helps you generate your first sale in the ecommerce world!