Build a JAMstack Ecommerce Website with Next.js, Contentful, and Foxy
November 3, 2021 - How To

In this step-by-step guide, we’re going to build a ecommerce website from scratch using:
Next.js – a React framework that offers features like image optimization, hybrid static & server rendering, TypeScript support, smart bundling, route pre-fetching and more.
Contentful – a headless CMS (content management system).
Foxy – a headless ecommerce solution providing a highly customizable and powerful shopping cart and checkout experience.
Tailwind CSS – a utility-first CSS framework.
GraphQL – a query language for APIs.
Take a sneak peek of what we’re building

Live demo: https://foxy-contentful-nextjs.vercel.app/
Source code: https://github.com/Foxy/foxy-contentful-nextjs-example-site
⚠️ Note: This guide assumes you have basic knowledge of JavaScript and React. If you’re new to React, feel free to check out the official React tutorial first. It’ll also be helpful to go through the basics of Next.js.
Initialize project
Requirements
Next.js requires Node.js 10.13 or later and Tailwind CSS requires Node.js 12.13.0 or higher. You can run node -v in the terminal to check the version on your system. npm and npx are also required to install dependencies and run commands, which should come out of the box when you install Node.js.
Create a Next.js app
In the terminal, cd to a directory you want to start this project, and run the following command to create a new Next.js app called foxy-contentful-nextjs (or whatever you like):
npx create-next-app foxy-contentful-nextjsAfter the installation is complete, cd foxy-contentful-nextjs and run npm run dev . The development server will start on port 3000. Open http://localhost:3000/ in your browser, you’ll then see a “Welcome to Next.js!” page.
Set up Tailwind CSS
Following Tailwind’s Next.js setup guide, we can run the command below to install Tailwind and its peer-dependencies:
npm install -D tailwindcss@latest postcss@latest autoprefixer@latestThen, generate tailwind.config.js and postcss.config.js configuration files using this command:
npx tailwindcss init -pOpen tailwind.config.js in the text editor, and configure the purge option so that unused styles would be removed in production:
// tailwind.config.js

module.exports = {
  purge: ["./pages/**/*.{js,ts,jsx,tsx}", "./components/**/*.{js,ts,jsx,tsx}"],
  darkMode: false, // or 'media' or 'class'
  theme: {
    extend: {},
  },
  variants: {
    extend: {},
  },
  plugins: [],
};
After importing Tailwind in pages/_app.js, we can delete the CSS files Next.js creates by default like globals.css and Home.module.css, and any references to them.
// pages/_app.js

import "tailwindcss/tailwind.css";

function MyApp({ Component, pageProps }) {
  return <Component {...pageProps} />;
}

export default MyApp;
Now, let’s make some changes in the index.js page:
// pages/index.js

export default function Home() {
  return (
    <div className="px-16 py-10 md:px-24 lg:px-28">
      <h1 className="text-2xl">Welcome to foxy-contentful-nextjs!</h1>
    </div>
  );
}
If the dev server was shut down in a previous step, run npm run dev again and we’ll see Tailwind is applied to the index page.

Add products in Contentful and fetch product data
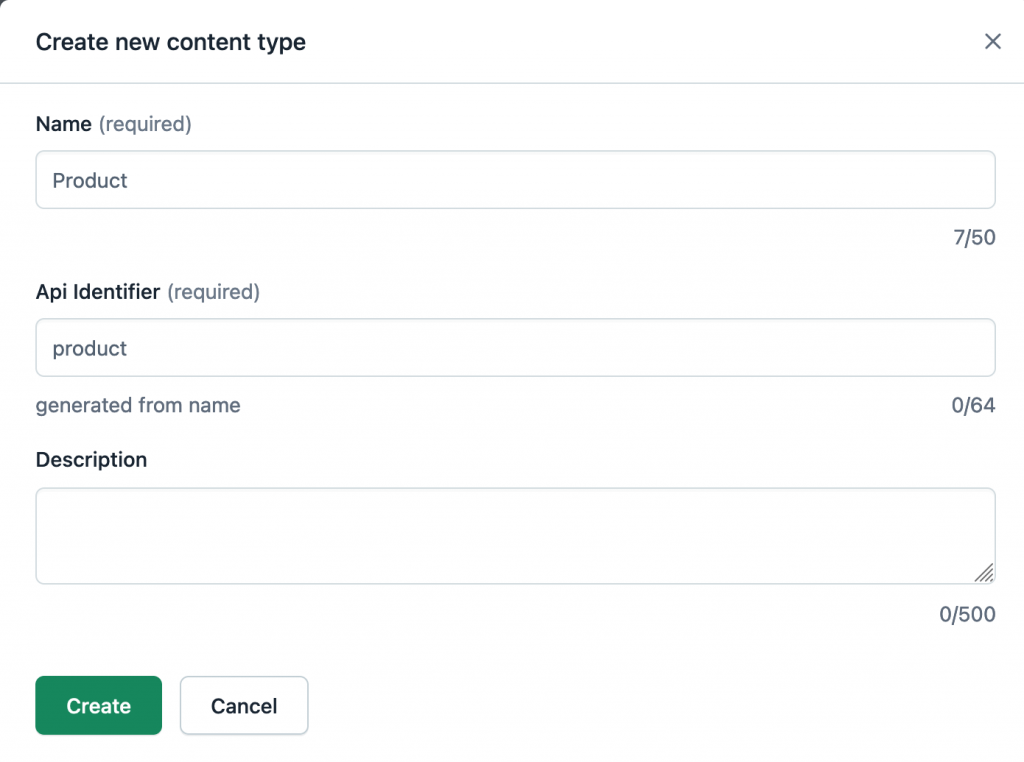
Set up Contentful
Sign up or log in at Contentful and create a new empty space from the dashboard. From the newly created space, go to the Content model tab and add a new content type: give it the Name Product, and the Api Identifier will be auto-generated as product.
Then, add the following fields to the Product model and configure all fields as required:
name– Text field (type short text)slug– Text field (type short text). You can optionally go to the settings of this field, then under Appearance, select Slug so this field is displayed as a slug of thenamefieldprice– Number field (type Decimal)image– Media field (type One file)inventory– Number field (type Integer)description– Rich text fieldfeatured– Boolean field
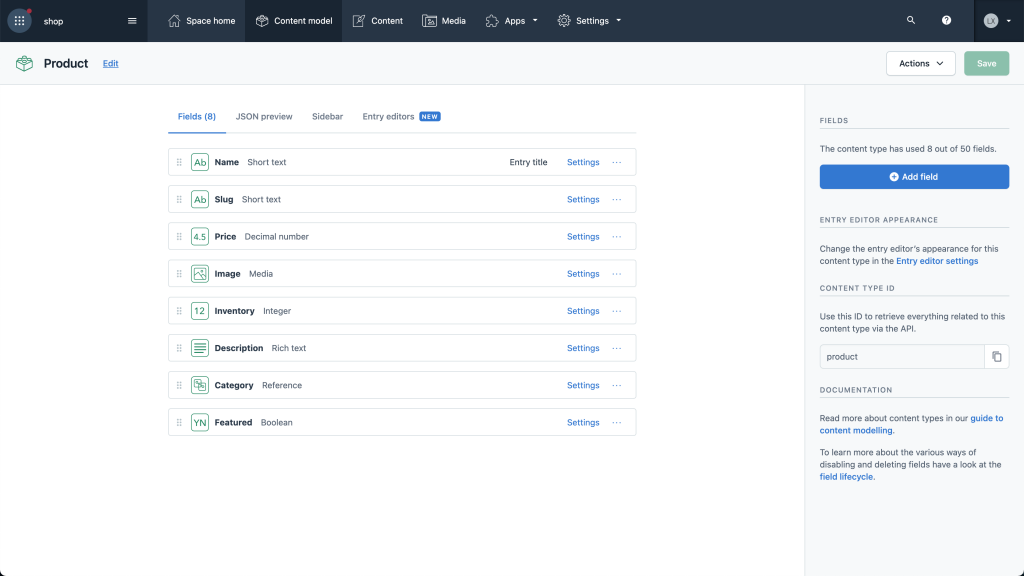
Click “save” in the upper right. Next, head to the Content tab, add a few products and publish.
Fetch product data
Before we get into the code, we first need to get the API keys so our Next.js app can communicate with Contentful. Go Settings > API keys from the current Contentful space. From the Content delivery / preview tokens tab, click the Add API key button to generate the access tokens. Give it a name and description that makes sense for what you’re building.
Back in the code editor, create a new file called .env.local in the root directory for storing all the environment variables, and paste the Space ID and Content Delivery API – access token values in it:
// .env.local

CONTENTFUL_SPACE_ID=
CONTENTFUL_ACCESS_TOKEN=
We’ll use [axios](https://www.npmjs.com/package/axios) (an easy-to-use library to make HTTP requests) lfor data fetching, so open the terminal and install:
npm install axiosThen, create a new folder lib for some helper functions. Inside the folder, create a api.js file, where we’ll write the functions to fetch data via the Contentful GraphQL Content API. Review the following code to get an idea of what it’s doing.
// lib/api.js

import axios from "axios";

// product fields to fetch
const PRODUCT_GRAPHQL_FIELDS = `
name
slug
price
image {
  url
}
inventory
description {
  json
}
`;

// connect Contentful
async function fetchGraphQL(query) {
  try {
    const res = await axios.post(
      `https://graphql.contentful.com/content/v1/spaces/${process.env.CONTENTFUL_SPACE_ID}`,
      { query },
      {
        headers: {
          "Content-Type": "application/json",
          Authorization: `Bearer ${process.env.CONTENTFUL_ACCESS_TOKEN}`,
        },
      }
    );
    return res.data;
  } catch (error) {
    console.error("Failed to fetch Contentful");
  }
}

// helper functions for extracting product entries from response
function extractProduct(fetchResponse) {
  return fetchResponse?.data?.productCollection?.items?.[0];
}

function extractProductEntries(fetchResponse) {
  return fetchResponse?.data?.productCollection?.items;
}

// get products whose featured field is set to true
export async function getFeaturedProducts() {
  const entries = await fetchGraphQL(
    `query {
      productCollection(where: { featured: true }) {
        items {
          ${PRODUCT_GRAPHQL_FIELDS}
        }
      }
    }`
  );

  return extractProductEntries(entries);
}

// get all products
export async function getAllProducts() {
  const entries = await fetchGraphQL(
    `query {
      productCollection(where: { slug_exists: true }) {
        items {
          ${PRODUCT_GRAPHQL_FIELDS}
        }
      }
    }`
  );

  return extractProductEntries(entries);
}

// get a specific product by its slug
export async function getProductBySlug(slug) {
  const entry = await fetchGraphQL(
    `query {
      productCollection(where: { slug: "${slug}" }, limit: 1) {
        items {
          ${PRODUCT_GRAPHQL_FIELDS}
        }
      }
    }`
  );

  return {
    product: extractProduct(entry),
  };
}
Create pages and components
<Layout /> component
First, create a components folder and a layout.js file in it. We’ll create a Layout component that wraps the entire app. Note that the class names are Tailwind classes.
// components/layout.js

import Link from "next/link";

export default function Layout({ children }) {
  return (
    <>
      <nav className="flex items-center h-16 bg-gray-600 text-gray-100 tracking-widest">
        <h1 className="flex-grow ml-5 text-2xl font-semibold">Foxy Store</h1>

        <Link href="/">
          <a className="mr-5 text-xl font-medium hover:underline">Home</a>
        </Link>

        <Link href="/products">
          <a className="mr-5 text-xl font-medium hover:underline">Products</a>
        </Link>

        <a className="mr-5 text-xl font-medium hover:underline cursor-pointer">
          Cart
        </a>
      </nav>

      <main>{children}</main>
    </>
  );
}
💡 In Next.js, we use the Link component from next/link to wrap the <a> tag. This component allows us to do client-side navigation to a different page in the application.
Then edit the _app.js file to include the Layout component across the application:
// pages/_app.js

import "tailwindcss/tailwind.css";
import Layout from "../components/layout";

function MyApp({ Component, pageProps }) {
  return (
    <Layout>
      <Component {...pageProps} />
    </Layout>
  );
}

export default MyApp;
And we’ll see a nav bar on the top of the page.
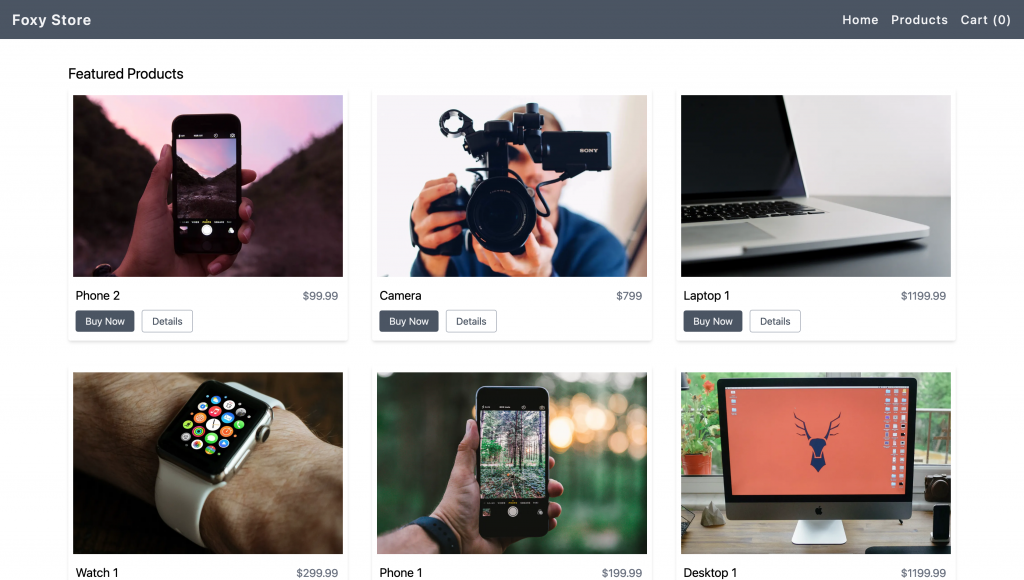
Home page with featured products
💡 With the file-system based router in Next.js, we can easily create pages that are associated with a route based on their file name.
Modify the pages/index.js page to display the products that are configured as featured in Contentful:
// pages/index.js
import Link from "next/link";
import Image from "next/image";
import { getFeaturedProducts } from "../lib/api";
export default function Home({ featuredProducts }) {
return (
<div className="px-16 py-10 md:px-24 lg:px-28">
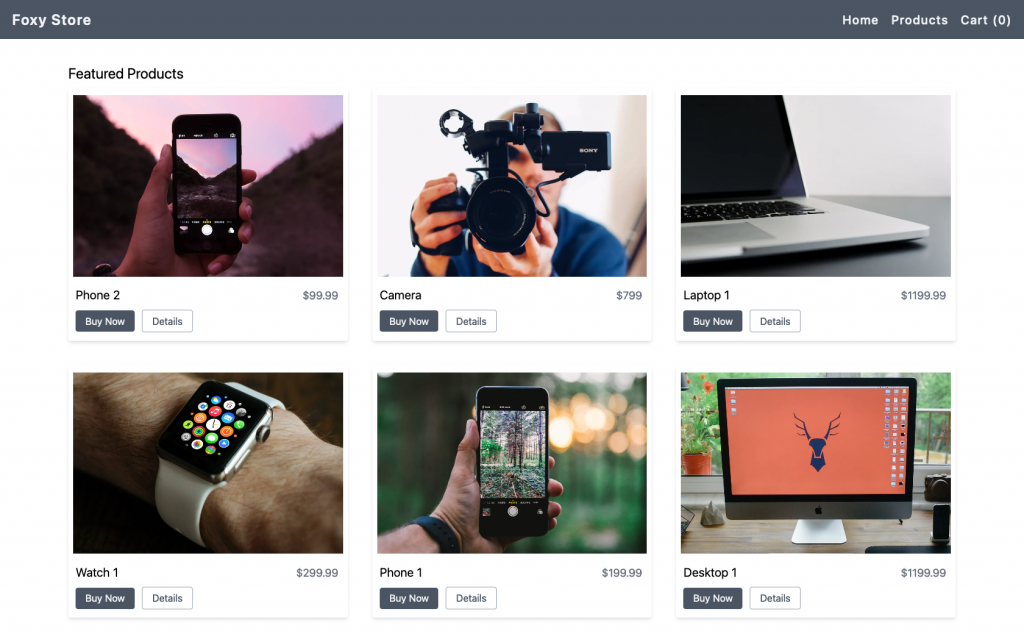
<h2 className="text-2xl mb-2">Featured Products</h2>
<div className="grid md:grid-cols-2 lg:grid-cols-3 gap-10">
{featuredProducts.map((product) => (
<div
key={product.slug}
className="rounded bg-white border-gray-200 shadow-md hover:shadow-xl flex justify-center flex-col px-2 pt-3 pb-5"
>
<Image
src={product.image.url}
layout="intrinsic"
width={550}
height={370}
/>
<div className="mt-4 flex items-baseline">
<h1 className="ml-1 text-xl flex-1">{product.name}</h1>
<h2 className="mr-2 text-lg text-gray-500">${product.price}</h2>
</div>
<div className="mt-4">
<a className="ml-1 bg-gray-600 rounded px-4 py-2 text-gray-100 cursor-pointer">
Buy Now
</a>
<Link
as={`/products/${product.slug}`}
href="/products/[slug]"
passHref
>
<a className="ml-3 border border-gray-400 rounded px-4 py-2 text-gray-600 cursor-pointer">
Details
</a>
</Link>
</div>
</div>
))}
</div>
</div>
);
}
export const getStaticProps = async () => {
const featuredProducts = await getFeaturedProducts();
return {
props: { featuredProducts },
};
};💡 If we export an async function called getStaticProps from a page, Next.js will pre-render this page at build time using the props returned by getStaticProps.
⚠️ If the above code errors, take a look at the error message and try solving it. Or just continue on…
In the above code, we use the new <Image /> component introduced in Next.js 10, which offers automatic image optimization. To properly show images hosted on an external URL, we’ll need to specify the image domains in the next.config.js file:
// next.config.js

module.exports = {
  images: {
    domains: ["images.ctfassets.net"],
  },
};
All products page
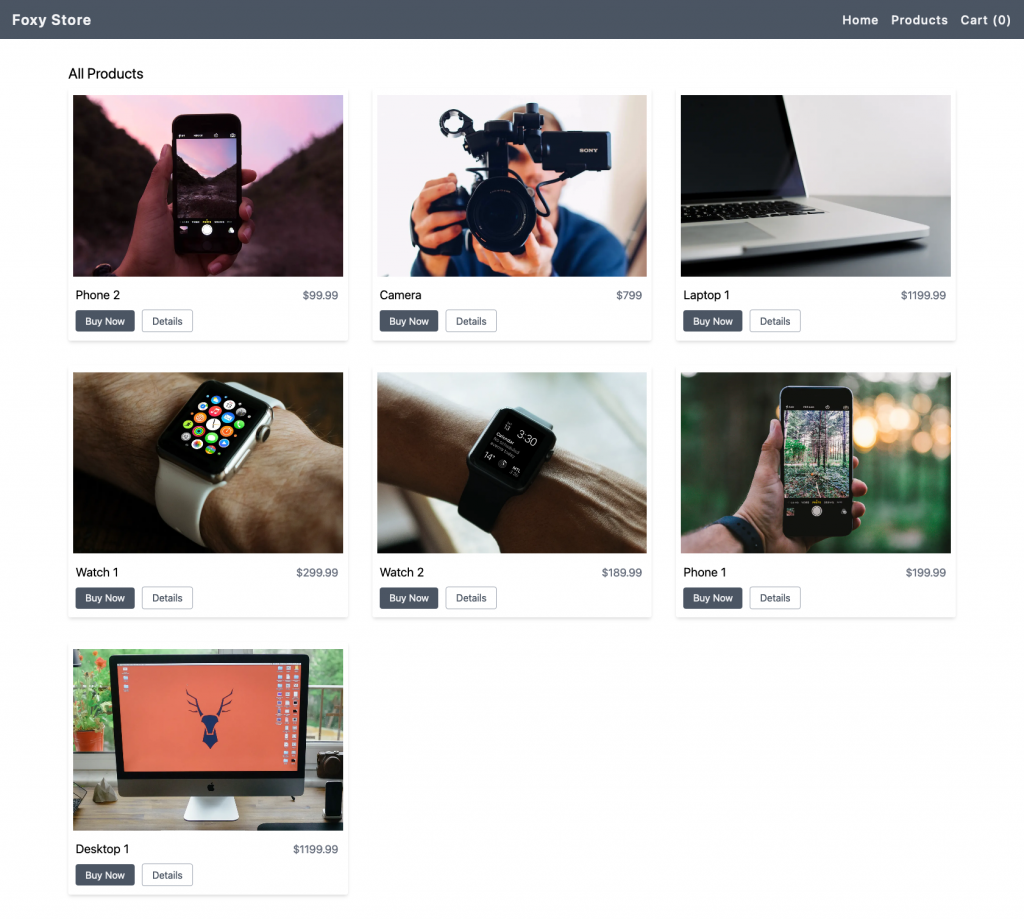
Let’s also create a page that contains all products, which would be similar to the home page: create a products directory under pages , then create an index.js file that contains all products:
// pages/products/index.js

import Link from "next/link";
import Image from "next/image";

import { getAllProducts } from "../../lib/api";

export default function AllProducts({ allProducts }) {
  return (
    <div className="px-16 py-10 md:px-24 lg:px-28">
      <h2 className="text-2xl mb-2">All Products</h2>

      <div className="grid md:grid-cols-2 lg:grid-cols-3 gap-10">
        {allProducts.map((product) => (
          <div
            key={product.slug}
            className="rounded bg-white border-gray-200 shadow-md hover:shadow-xl flex justify-center flex-col px-2 pt-3 pb-5"
          >
            <Image
              src={product.image.url}
              layout="intrinsic"
              width={550}
              height={370}
            />

            <div className="mt-4 flex items-baseline">
              <h1 className="ml-1 text-xl flex-1">{product.name}</h1>
              <h2 className="mr-2 text-lg text-gray-500">${product.price}</h2>
            </div>

            <div className="mt-4">
              <a className="ml-1 bg-gray-600 rounded px-4 py-2 text-gray-100 cursor-pointer">
                Buy Now
              </a>
              <Link
                as={`/products/${product.slug}`}
                href="/products/[slug]"
                passHref
              >
                <a className="ml-3 border border-gray-400 rounded px-4 py-2 text-gray-600 cursor-pointer">
                  Details
                </a>
              </Link>
            </div>
          </div>
        ))}
      </div>
    </div>
  );
}

export const getStaticProps = async () => {
  const allProducts = await getAllProducts();

  return {
    props: { allProducts },
  };
};
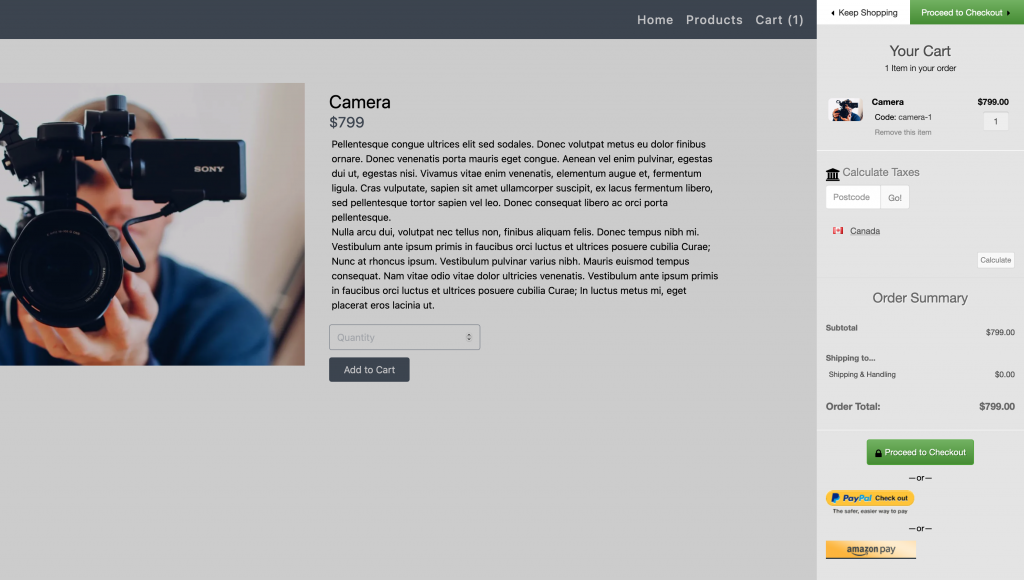
Pages for each product
Remember we’ve configured the product description field as a rich text field in Contentful? This type of field would be returned as a object in response, so we’ll use [@contentful/rich-text-react-renderer](https://www.npmjs.com/package/@contentful/rich-text-react-renderer) to parse the text content in the object:
npm install @contentful/rich-text-react-rendererCreate dynamic route pages for products in pages/products/[slug].js, with an add-to-cart form inside:
// pages/products/[slug].js

import Image from "next/image";
import { documentToReactComponents } from "@contentful/rich-text-react-renderer";

import { getAllProducts, getProductBySlug } from "../../lib/api";

export default function Product({ product }) {
  return (
    <div className="px-16 py-10 md:px-24 lg:px-28">
      <div className="mt-8 grid lg:grid-cols-2">
        <div>
          <Image
            src={product.image.url}
            layout="responsive"
            width={550}
            height={350}
          />
        </div>

        <div className="py-5 lg:px-10 lg:py-3">
          <h1 className="text-3xl">{product.name}</h1>
          <h2 className="text-2xl text-gray-600">${product.price}</h2>
          <div className="my-2 mx-1">
            {documentToReactComponents(product.description.json)}
          </div>

          <form>
            <input
              type="number"
              min="1"
              step="1"
              defaultValue="1"
              name="quantity"
              placeholder="Quantity"
              className="mt-5 mb-3 border border-gray-400 rounded py-2 px-3 block"
            />

            <button
              type="submit"
              className="bg-gray-600 rounded py-2 px-6 text-gray-100 cursor-pointer"
            >
              Add to Cart
            </button>
          </form>
        </div>
      </div>
    </div>
  );
}

export async function getStaticProps({ params }) {
  const data = await getProductBySlug(params.slug);

  return {
    props: {
      product: data?.product ?? null,
    },
  };
}

export async function getStaticPaths() {
  const allProducts = await getAllProducts();

  return {
    paths: allProducts?.map(({ slug }) => `/products/${slug}`) ?? [],
    fallback: false,
  };
}
💡 If a page has dynamic routes and uses getStaticProps it needs to define a list of paths that have to be rendered to HTML at build time.
If we export an async function called getStaticPaths from a page that uses dynamic routes, Next.js will statically pre-render all the paths specified by getStaticPaths.

Integrate Foxy into the Next.js app
If you haven’t already, sign up for a free account at Foxy.
Add a new variable for Foxy subdomain in the .env.local file, with a NEXT_PUBLIC_ prefix so it’s exposed to the browser:
// .env.local

NEXT_PUBLIC_FOXY_SUBDOMAIN=
We’ll need to include Foxy’s script before </body> tag, which should be added in the _document.js file in Next.js:
// pages/_document.js

import Document, { Html, Head, Main, NextScript } from "next/document";

export default class MyDocument extends Document {
  render() {
    return (
      <Html lang="en">
        <Head />
        <body>
          <Main />
          <NextScript />

          {/* FOXYCART */}
          <script
            data-cfasync="false"
            src={`https://cdn.foxycart.com/${process.env.NEXT_PUBLIC_FOXY_SUBDOMAIN}/loader.js`}
            async
            defer
          ></script>
        </body>
      </Html>
    );
  }
}
There are two ways to add a product to cart in Foxy – via a link or a form, then modify the URL parameters or form elements as needed. Some examples can be found on the homepage here.
In addition to some core product information like name, price, quantity, code, image, we can also add a quantity_max parameter that indicates the product’s current inventory to prevent oversell. A complete list of product parameters can be found here.
Buy Now button
A Buy Now button often refers to skipping the shopping cart and going to checkout directly. In Foxy, we can do this by attaching a &cart=checkout parameter to the purchase link. So, modify the href attribute in the Buy Now buttons on the featured products page and all products page to this:
// pages/index.js && pages/products/index.js

<a
  href={`https://${process.env.NEXT_PUBLIC_FOXY_SUBDOMAIN}.foxycart.com/cart?name=${encodeURIComponent(product.name)}&price=${product.price}&image=${encodeURIComponent(product.image.url)}&code=${encodeURIComponent(product.slug)}&quantity_max=${product.inventory}&cart=checkout`}
  className="ml-1 bg-gray-600 rounded px-4 py-2 text-gray-100 cursor-pointer"
>
  Buy Now
</a>
💡 Wrapping the URL parameters in encodeURIComponent() encodes them so that they get passed to Foxy correctly.
🔐 You may be thinking “Wait a minute, those values can be changed by a website visitor!” Don’t worry. We’ll lock things down a little further down the page.
Add-to-cart form
For a purchase form, besides adding the action and method attributes to the form element, we also need some elements to pass the product details to the cart, so the add-to-cart form on the product page will look something like this:
// pages/products/[slug].js

<form
  action={`https://${process.env.NEXT_PUBLIC_FOXY_SUBDOMAIN}.foxycart.com/cart`}
  method="POST"
>
  <input type="hidden" name="name" value={product.name} />
  <input type="hidden" name="price" value={product.price} />
  <input type="hidden" name="quantity_max" value={product.inventory} />
  <input type="hidden" name="image" value={product.image.url} />
  ...
</form>
Mini-cart
Let’s also add a quick link in the navbar to open the cart and indicate the product quantity in cart:
// components/layout.js

<a
  href={`https://${process.env.NEXT_PUBLIC_FOXY_SUBDOMAIN}.foxycart.com/cart?cart=view`}
  className="mr-5 text-xl font-medium hover:underline cursor-pointer"
>
  Cart (<span data-fc-id="minicart-quantity">0</span>)
</a>
Add Foxy HMAC cart validation
You probably know how easy is to modify the HTML on a webpage using the browser’s dev tools, which means there is a possibility that someone can modify the product price on your site and checkout without any issues. This sounds a nightmare to merchants, but the good news is, Foxy provides a HMAC cart validation functionality, and with the official Foxy SDK released recently, this can be done in just a few more steps.
💡 Though the Foxy SDK can sign entire HTML pages via the signHtml method, that’s not as easy to do in this Vercel + Next.js build, so we’ll take a more targeted approach, below.
Implement using Foxy SDK
Head to Advanced Settings in the Foxy admin and enable cart validation by checking the “would you like to enable cart validation?” option. Then look for the “store secret” field, click the “Show” button, and copy the value in the text box.
Add a new variable for Foxy store secret in the .env.local file, and paste the value we just copied from the Foxy admin:
// .env.local

FOXY_STORE_SECRET=
Install Foxy SDK. We’ll use the Signer object to generate signed links and forms.
npm i @foxy.io/sdkCreate a new file named foxy-signer.js in the lib folder, which includes two helper functions (getFoxyLink and getFoxyForm) that return a Foxy purchase link or form, and have it signed only if the FOXY_STORE_SECRET environment variable is set:
// lib/foxy-signer.js

import * as FoxySDK from "@foxy.io/sdk";

const signer = new FoxySDK.Backend.Signer(process.env.FOXY_STORE_SECRET);

export function getFoxyLink(product) {
  const link = `https://${process.env.NEXT_PUBLIC_FOXY_SUBDOMAIN}.foxycart.com/cart?name=${encodeURIComponent(product.name)}&price=${product.price}&image=${encodeURIComponent(product.image.url)}&code=${encodeURIComponent(product.slug)}&quantity_max=${product.inventory}&cart=checkout`;

  return process.env.FOXY_STORE_SECRET ? signer.signUrl(link) : link;
}

export function getFoxyForm(product) {
  const formHtml = `
    <form action="<https://$>{process.env.NEXT_PUBLIC_FOXY_SUBDOMAIN}.foxycart.com/cart" method="POST">
      <input type="hidden" name="name" value="${product.name}" />
      <input type="hidden" name="price" value="${product.price}" />
      <input type="hidden" name="quantity_max" value="${product.inventory}" />
      <input type="hidden" name="image" value="${product.image.url}" />
      <input type="hidden" name="code" value="${product.slug}" />

      <input
        type="number"
        min="1"
        step="1"
        value=""
        name="quantity"
        placeholder="Quantity"
        class="mt-5 mb-3 border border-gray-400 rounded py-2 px-3 block"
      />

      <button
        type="submit"
        class="bg-gray-600 rounded py-2 px-6 text-gray-100 cursor-pointer"
      >
        Add to Cart
      </button>
    </form>
  `;

  return process.env.FOXY_STORE_SECRET ? signer.signHtml(formHtml) : formHtml;
}
Since the HTML in this file includes Tailwind CSS, we’ll need to add this folder to the purge option in the Tailwind config file:
// tailwind.config.js

module.exports = {
  purge: ["./pages/**/*.js", "./components/**/*.js", "./lib/**/*.js"],
  ...
};
Then, we can replace all Foxy purchase links and forms in the pages with the functions:
// pages/index.js

...
import { getFoxyLink } from "../lib/foxy-signer";

export default function Home({ featuredProducts }) {
  return (
    ...
    <a
      href={product.foxyBuyLink}
      className="ml-1 bg-gray-600 rounded px-4 py-2 text-gray-100 cursor-pointer"
    >
      Buy Now
    </a>
    ...
  );
}

export const getStaticProps = async () => {
  const featuredProducts = await getFeaturedProducts();

  // Add a foxyBuyLink property for the generated link
  return {
    props: {
      featuredProducts: featuredProducts.map((product) => {
        return {
          ...product,
          foxyBuyLink: getFoxyLink(product),
        };
      }),
    },
  };
};


// pages/products/index.js

...
import { getFoxyLink } from "../../lib/foxy-signer";

export default function AllProducts({ allProducts }) {
  return (
    ...
    <a
      href={product.foxyBuyLink}
      className="ml-1 bg-gray-600 rounded px-4 py-2 text-gray-100 cursor-pointer"
    >
      Buy Now
    </a>
    ...
  );
}

export const getStaticProps = async () => {
  const allProducts = await getAllProducts();

  return {
    props: {
      allProducts: allProducts.map((product) => {
        return {
          ...product,
          foxyBuyLink: getFoxyLink(product),
        };
      }),
    },
  };
};


// pages/products/[slug].js

...
import { getFoxyForm } from "../../lib/foxy-signer";

export default function Product({ product, foxyForm }) {
  return (
    ...
    // replace the whole <form /> with this <div />
    <div dangerouslySetInnerHTML={{ __html: foxyForm }}></div>
    ...
  );
}

export async function getStaticProps({ params }) {
  const data = await getProductBySlug(params.slug);

  // Add a prop for the form HTML
  return {
    props: {
      product: data?.product ?? null,
      foxyForm: getFoxyForm(data?.product),
    },
  };
}

...
We did it! 🎉
Congratulations! You’ve successfully built your own ecommerce website in JAMstack!
To bring it further, you can deploy it to your preferred static site hosting platform like Vercel, Netlify or Cloudflare Pages. Comment the deployed link down below to show what you’ve built (or email us if you’re being shy)!